Firebase
Set
REACT_APP_DEFAULTAUTH=firebase in
the .env file.
Also fill all the firebase credentials in the
.env file.
Remove the
fake-backend setup code from the
App.js
Now just uncomment the below firebase setup code
in the App.js file.
// Import Firebase Configuration file
import { initFirebaseBackend } from "./helpers/firebase_helper";

const firebaseConfig = {
    apiKey: config.FIRE_BASE.API_KEY,
    authDomain: config.FIRE_BASE.AUTH_DOMAIN,
    databaseURL: config.FIRE_BASE.DATABASEURL,
    projectId: config.FIRE_BASE.PROJECTID,
    storageBucket: config.FIRE_BASE.STORAGEBUCKET,
    messagingSenderId: config.FIRE_BASE.MESSAGINGSENDERID,
    appId: config.FIRE_BASE.APPID,
    measurementId: config.FIRE_BASE.MEASUREMENTID,
};

// init firebase backend
initFirebaseBackend(firebaseConfig);
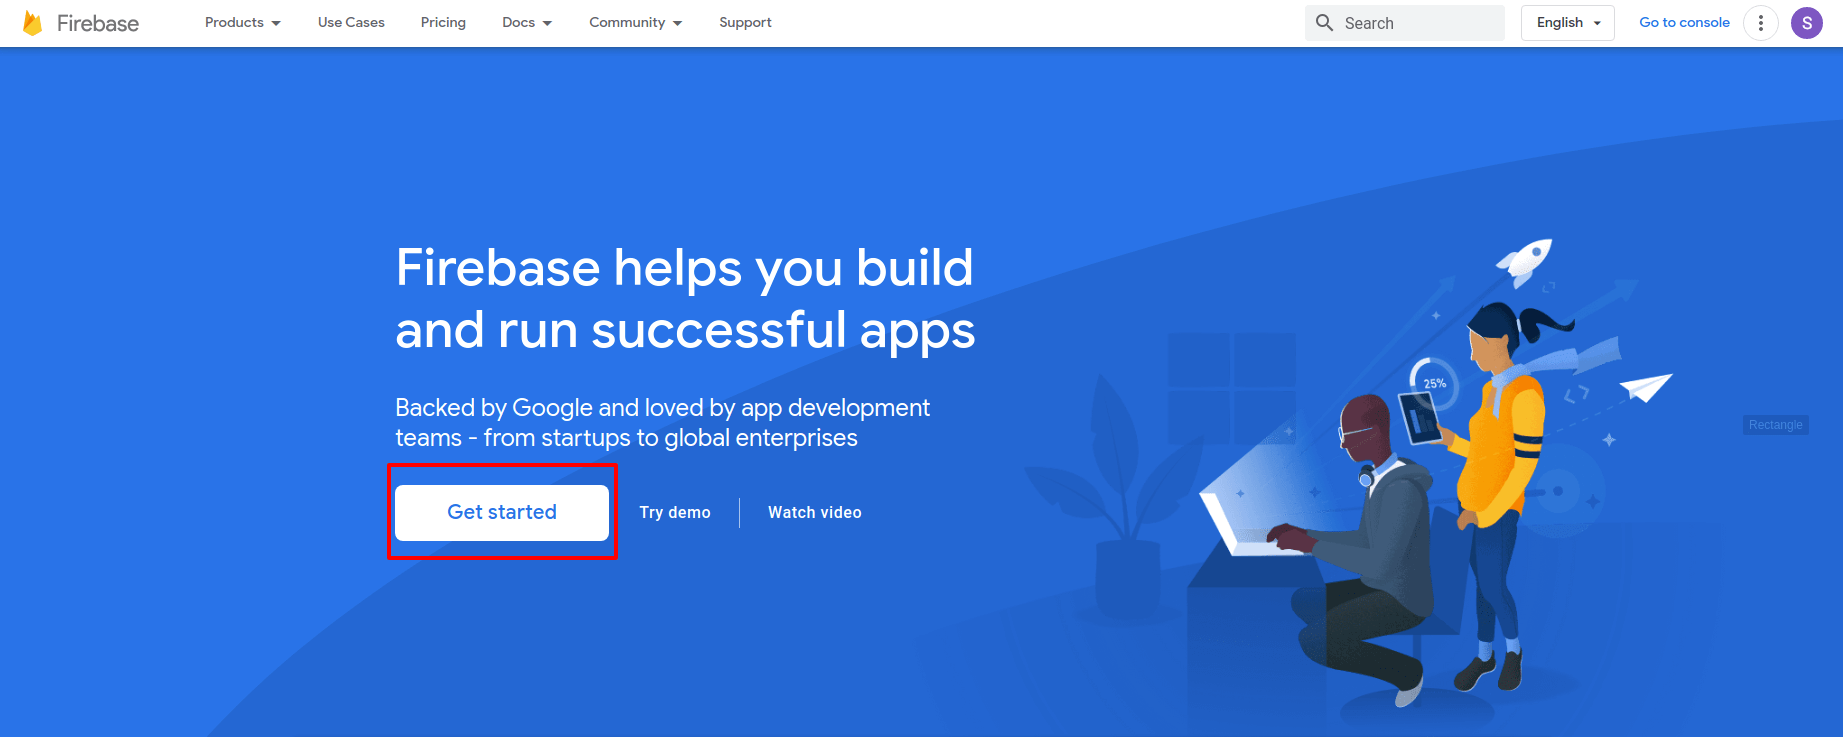
Follow the below step to setup your Firebase application :-
Do your Firebase project setup in
https://console.firebase.google.com/
Step 1 :- Click on the GET STARTED Button.
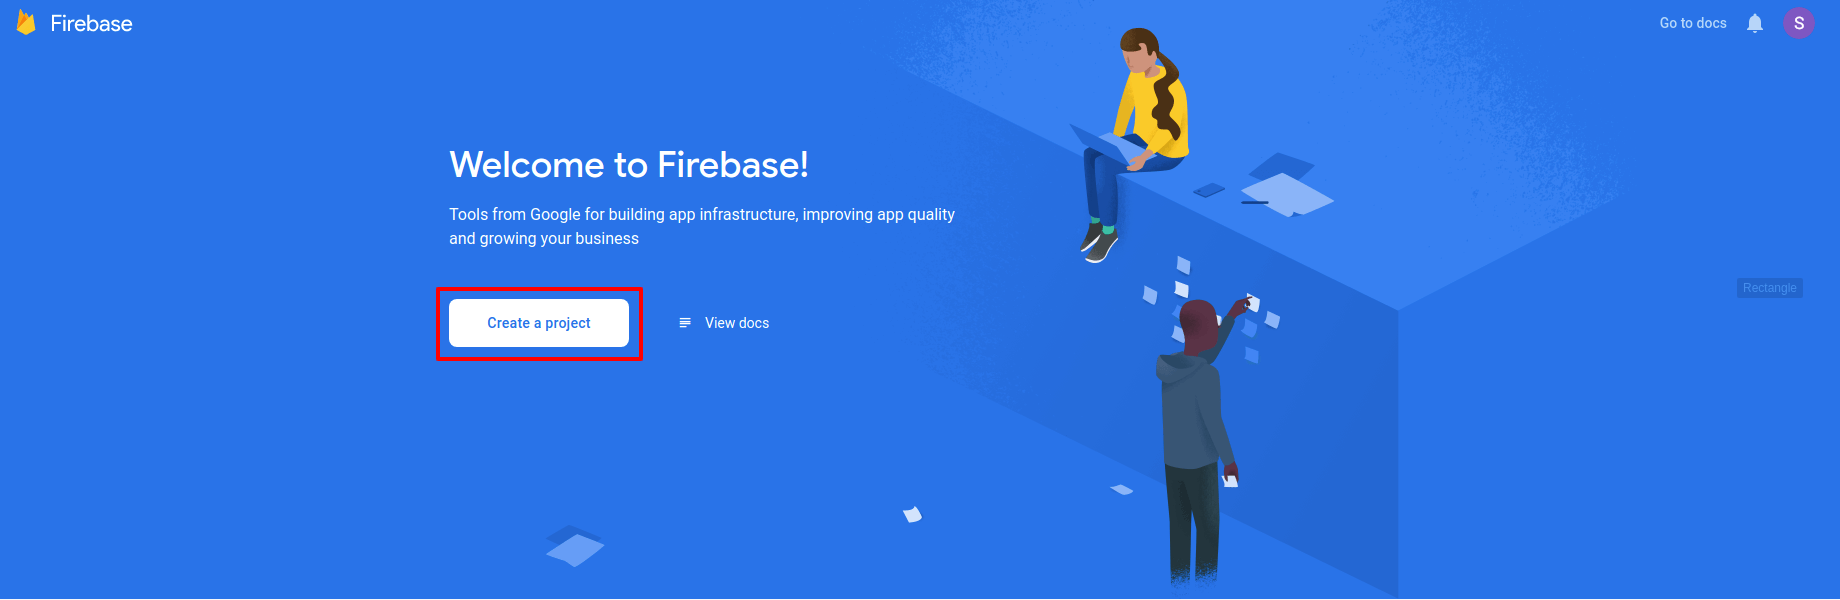
Step 2 :- You will find the tab of Create a Project, click on this.
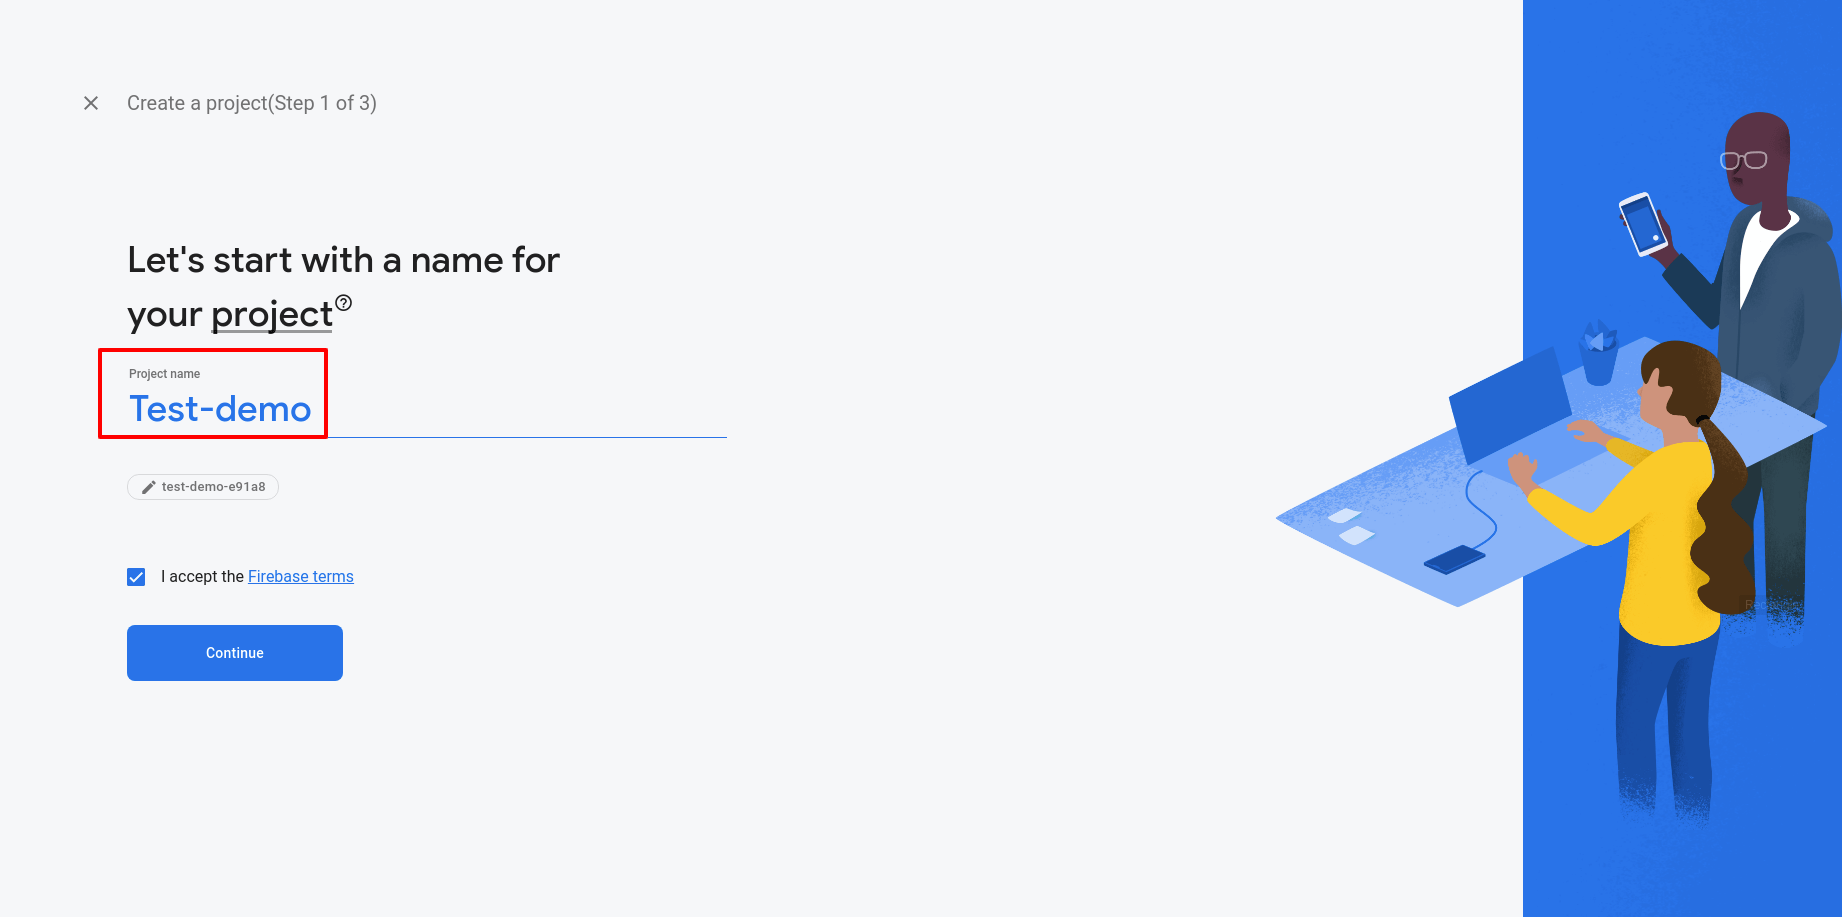
I :- Enter your project name, accept the Firebase terms and then press continue.
II :- Read the instrustions and continue.
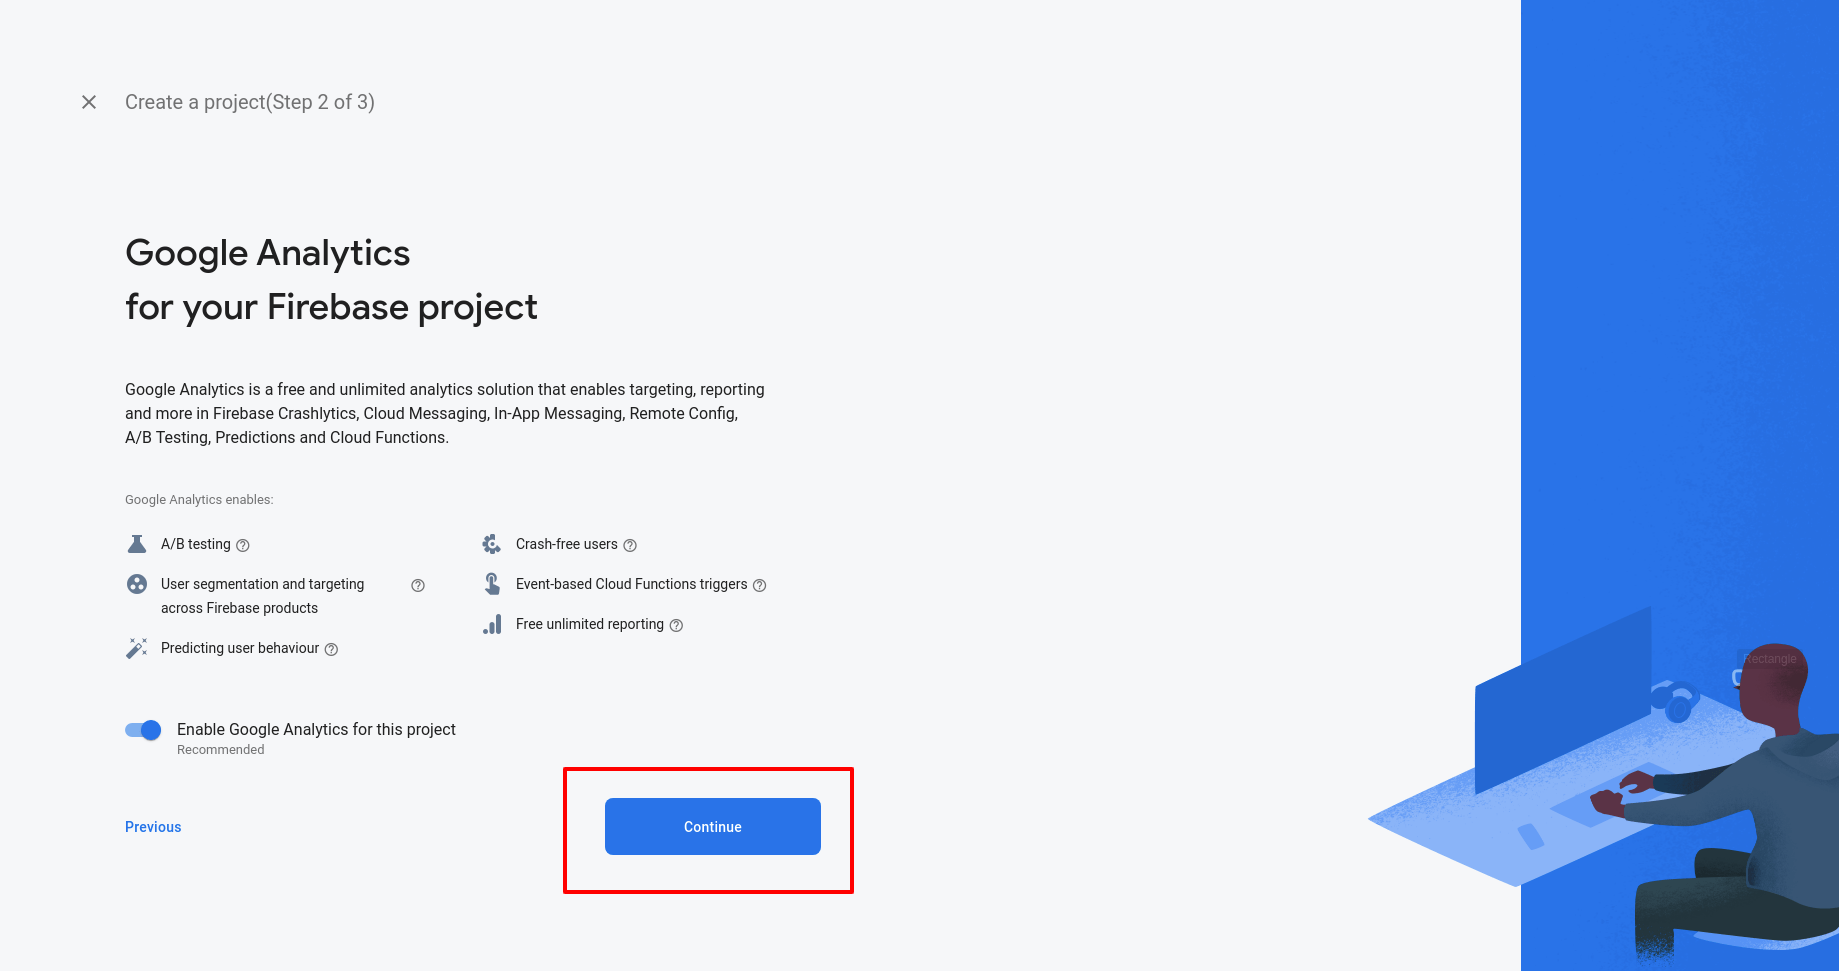
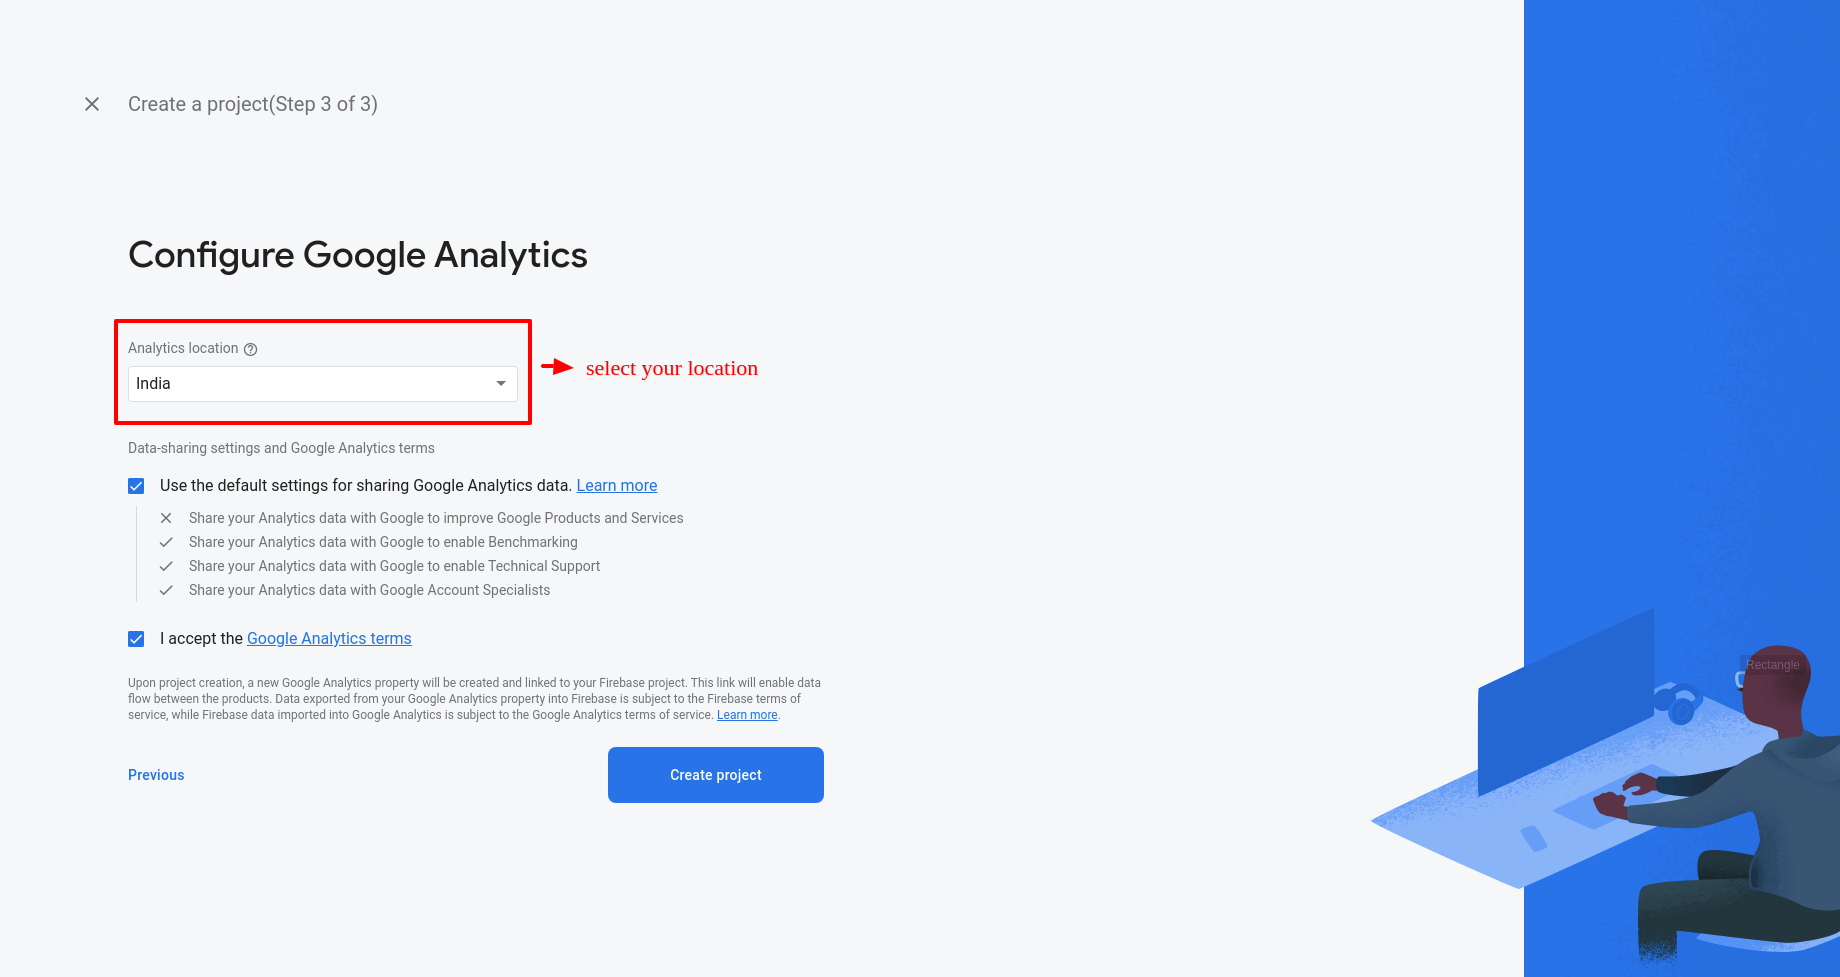
III :- First, select the location and accept the Google Analytics terms then click on the CREATE PROJECTS.
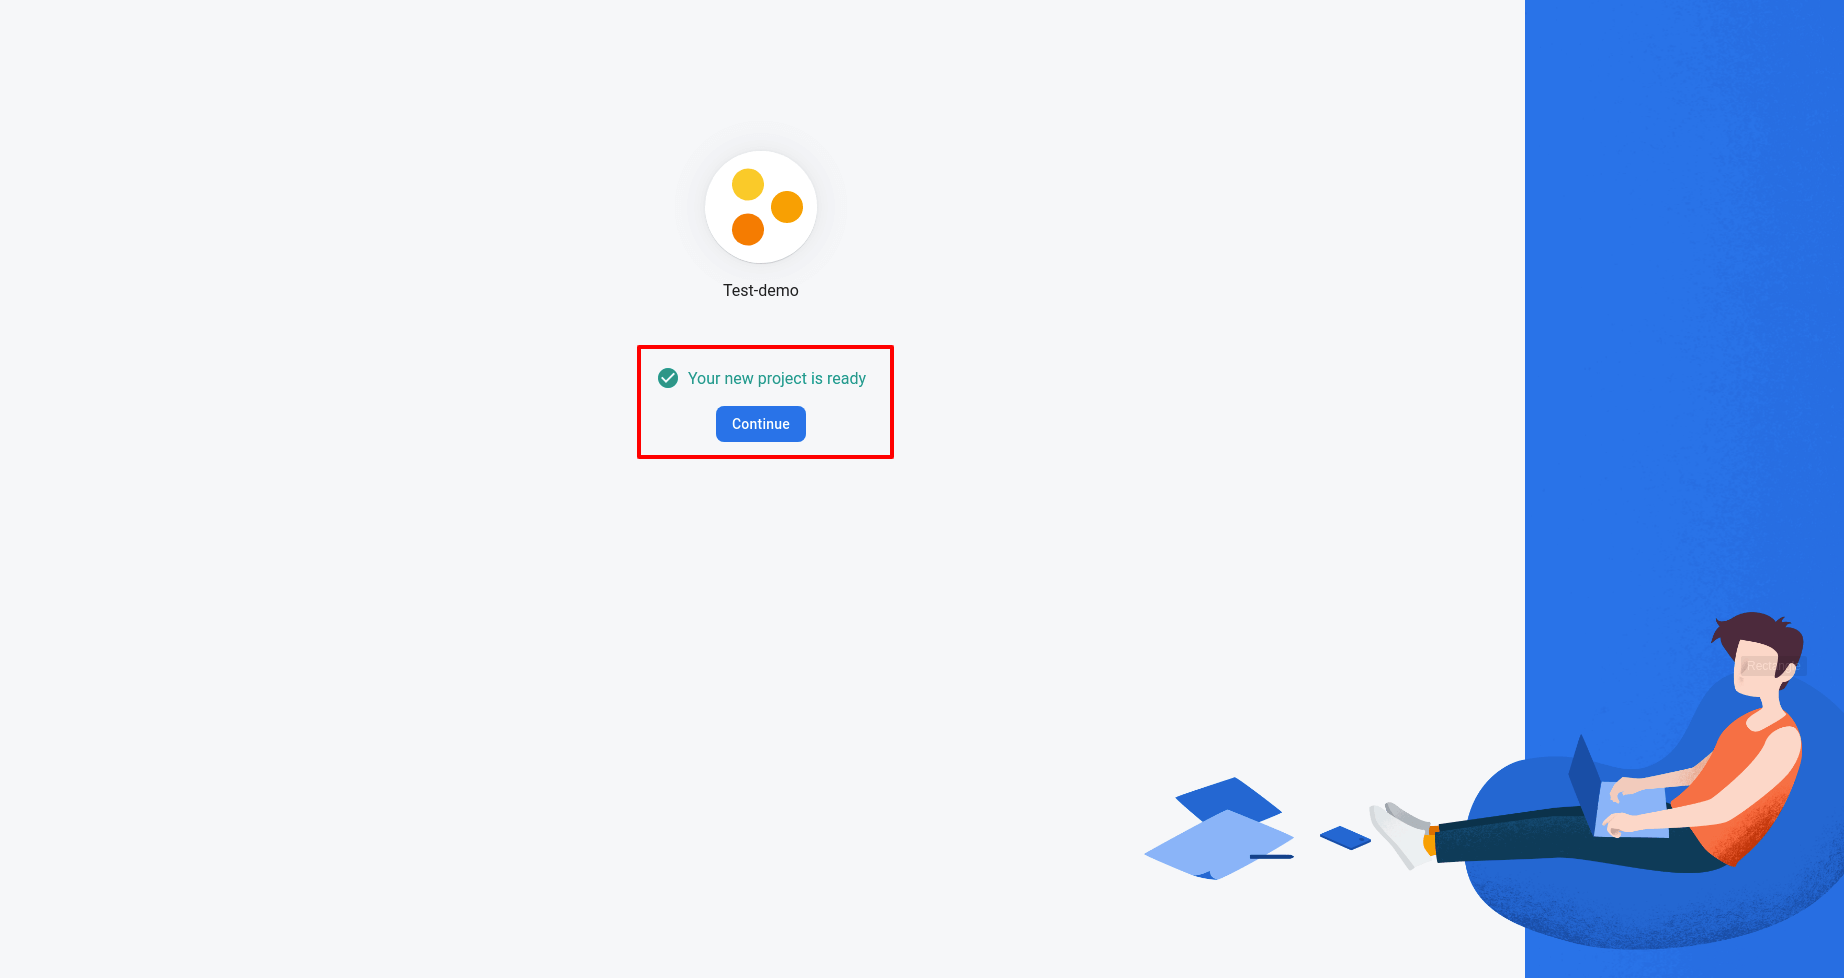
IV :- Now your project is created! Let's do some projects setup.
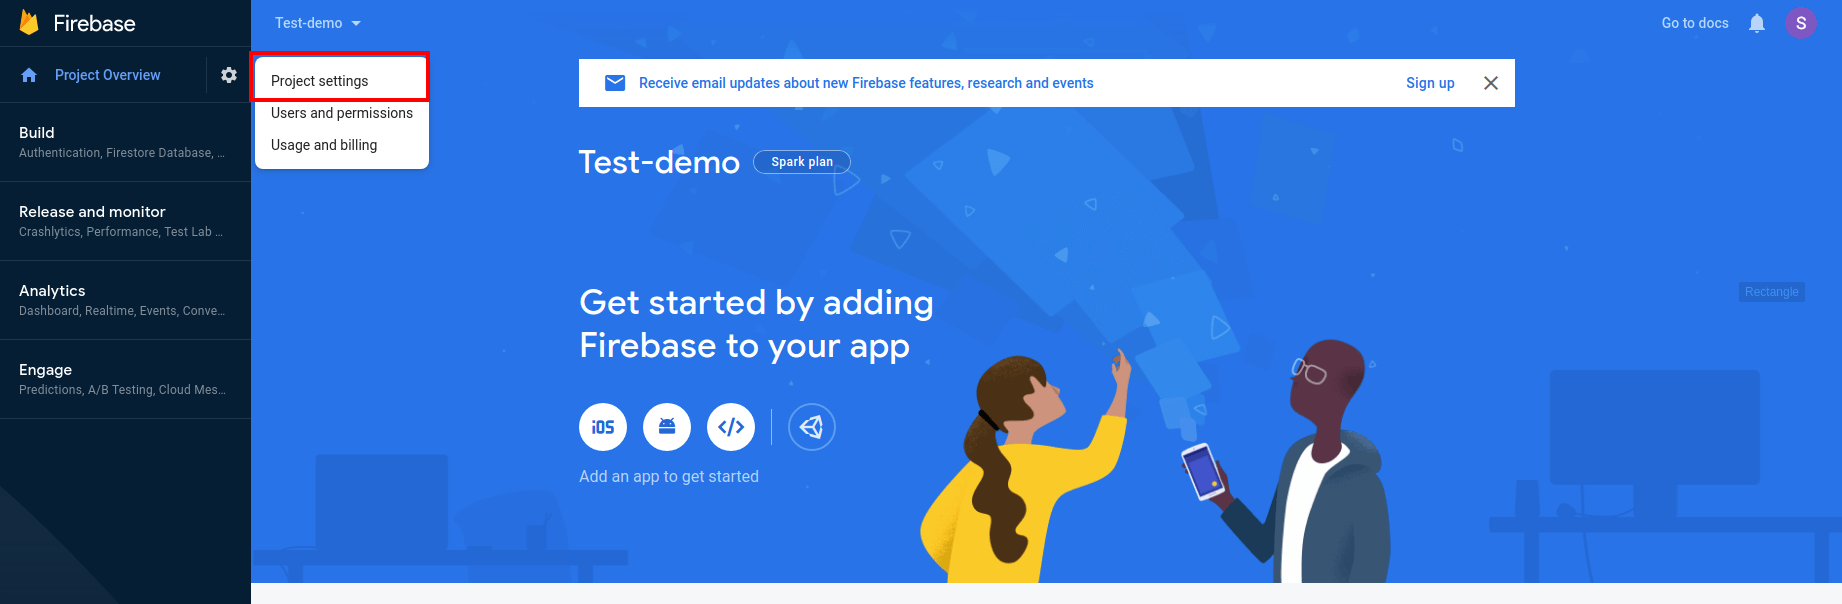
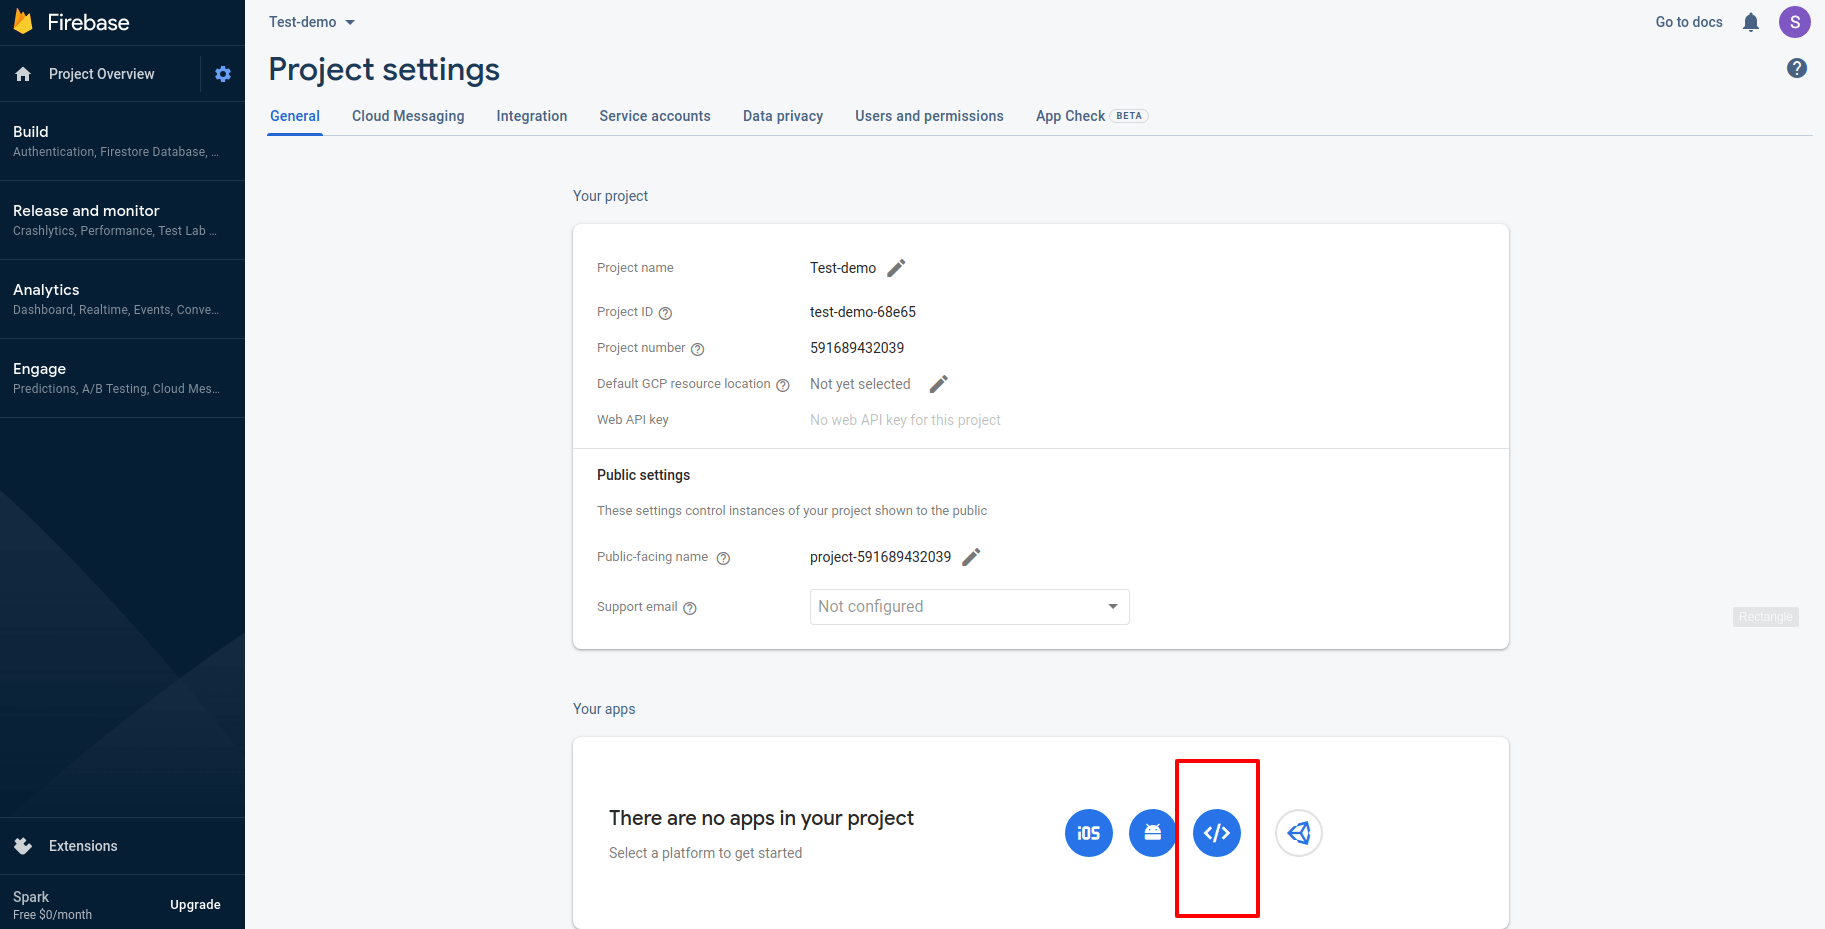
Step 3 :- Go to the Project Settings Page.
Step 4 :- Go to the Web app.
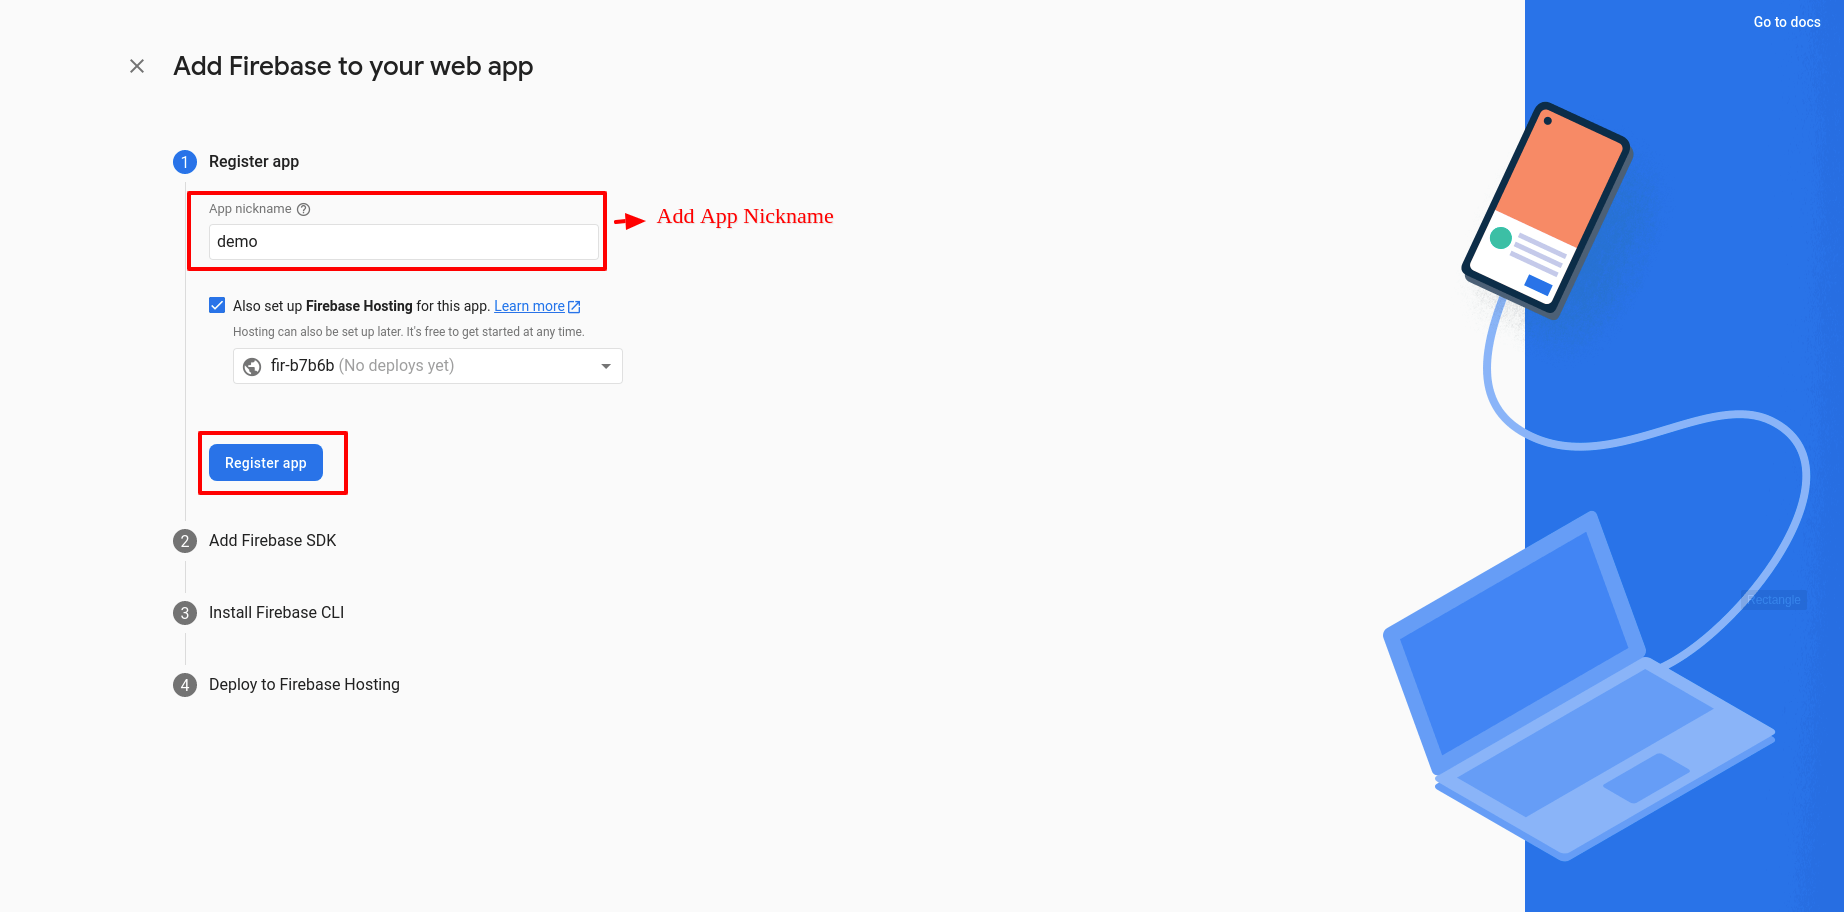
Step 5 :- Project settings > Enter your app nickname then click on the tab of REGISTER APP after that Read all details of Add Firebase SDK, Install Firebase CLI, and Deploy to Firebase Hosting and click on the CONTINUE TO THE CONSOLE
Step 6 :- Now you will find the options Config, click on that and you will see Firebase config details, do copy it and paste it into your project.
